colinedgar.ca
About my Website
Hello, and welcome to my personal website. I’m a retired civil engineer based in Ontario, Canada with hobby interests in 3D computer-aided design (CAD modeling), woodworking, and 3D printing. I also enjoy cycling, skiing, kayaking, and hiking (the photo above was taken on the Mont Blanc hiking trail near Chamonix, France).
I created this site to display some of my CAD model renders and simple build projects. I hope they are of interest to you or inspire ideas for your own projects.
CAD Modeling
During my career, I used 2D CAD occasionally for engineering and design work, but I wanted to continue using it for personal projects after retirement. AutoCAD is too expensive for my needs, so I chose TurboCAD Deluxe instead. This software’s capabilities have impressed me, especially considering its reasonable cost. I began by creating simple 2D drawings for woodworking projects and soon started exploring TurboCAD’s 3D modeling features.
As a kid in the late ’60s and early ’70s, I was fascinated by model railroading and Meccano. Meccano was (and still is) a model construction system invented by Frank Hornby in Liverpool, England in 1901. His goal was to teach children basic mechanical engineering principles from an early age. Meccano is currently owned by Spinmaster, a Canadian toy company, but the parts are now mostly made of plastic rather than metal.
I realized that building virtual Meccano models would be a great way to learn and practice 3D CAD modeling and, at the same time, revive a childhood interest. So, I proceeded to create a CAD library of the roughly 300 Meccano parts available in the early ’70s and began computer modeling some of the complex designs I could only dream about as a child.
Timothy Edwards’ Meccano website offers an extensive archive of original parts drawings and model instruction manuals. The New Zealand Meccano site (currently off-line) provides detailed information about the parts and their history. Both have become invaluable references for my CAD work.
I’m still amazed by the mechanical ingenuity of these models—the motors, gears, sprockets, chains, pulleys, and belts—all working together in designs that often use thousands of parts. Using CAD lets me build with an endless supply of parts and saves me from the heartbreak of having to dismantle the models in order to build a different one. Still, I sometimes wish I could hold the models in my hands and see them in operation.
All of my Meccano CAD models are based on using standard, unmodified Meccano parts (except for bending or curving them to the required shape). I use steel or copper wire and printed paper to add details, or where they’re called for in the model instructions. Some of the parts, such as the train coupling, were produced by Meccano for only a few years before being discontinued.
Since I didn’t keep any of the Meccano from my childhood, building real versions of these models would first require purchasing all of the necessary parts. I was curious how much that would cost, so I calculated an approximate price for each model (based on the price list of a Meccano parts seller). I was surprised to learn that the cost is in the thousands of dollars for most of the models—and that’s not including taxes, duties, and shipping.
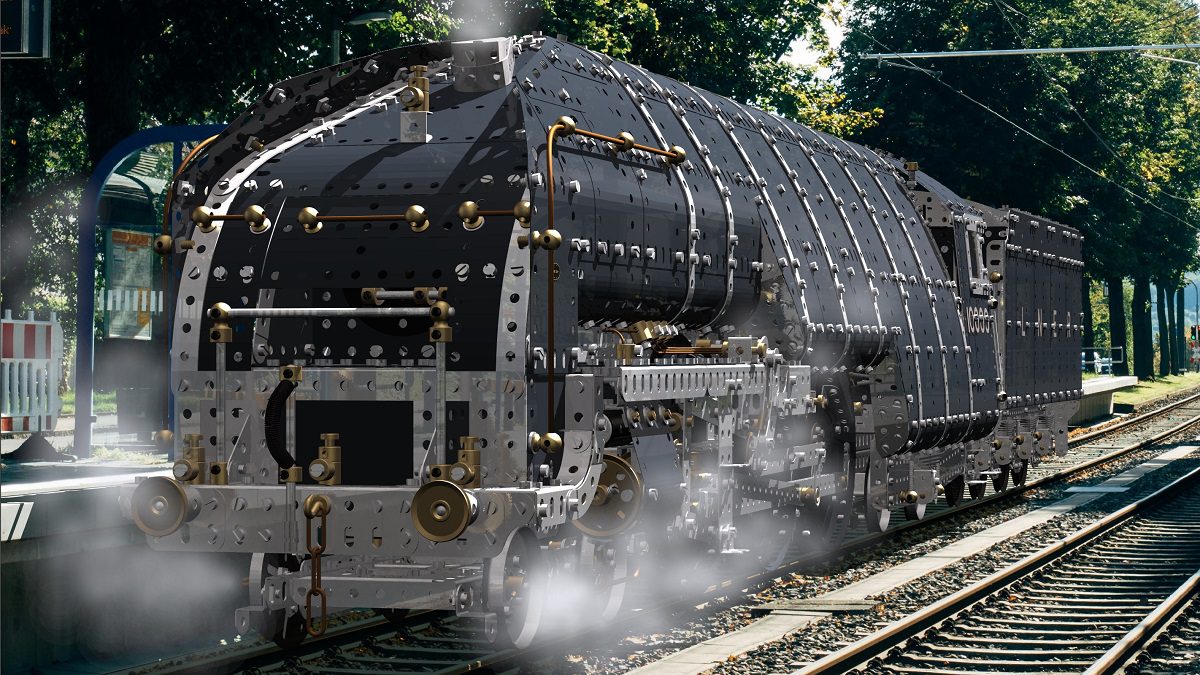
I also enjoy creating near-photorealistic renders of my CAD models and superimposing them onto photographic backgrounds to make them appear life-size and integrated into the original photo. To achieve this, I use fSpy, an open-source camera-matching software tool, along with a C# program I wrote, to synchronize TurboCAD’s camera position and perspective angle with the photograph.
Using TurboCAD’s LightWorks render engine, I can fine-tune the materials, luminance, and environment settings to generate realistic reflections, shadows, and lighting that blend naturally with the background scene. I then use GIMP, an open-source image editor, to add details like steam and smoke—effects that are difficult to create directly in TurboCAD. I don’t use AI to generate any of my renders.
You can see examples of these renders in the CAD Models section. Each image was exported as a high-resolution JPEG at 300 ppi.
Woodworking
My woodworking projects focus on function over aesthetics. I usually build only when a specific need comes up. My basement workshop is simple—a DeWalt jobsite table saw, a Ryobi drill press, and a handful of basic hand tools. I’m not equipped for fine woodworking or precision builds but I enjoy the challenge of solving problems, designing practical and affordable solutions, and figuring out how to construct them with the tools I have.
You can find photos and drawings of these projects in the Woodworking section.
3D Printing
I only recently ventured into the fascinating world of 3D printing and I’m still very much in the early stages. I picked up a Creality Ender-3 V3 SE when it went on sale and I’ve been pleasantly surprised by the print quality for an entry-level machine. After trying out a few different slicer programs, I settled on PrusaSlicer, mostly because I like its clean, intuitive interface.
Before printing anything, I read through many websites and forums to find the optimum printer and slicer settings for different filaments like PLA, PETG, and TPU. The research definitely paid off; I haven’t had any failed prints so far (though I haven’t tried printing with TPU yet).
My main use for the printer will be to make my own replacement parts for broken or missing plastic items—especially ones that are obsolete or overpriced. With a digital caliper, I can measure and recreate a part as a CAD model, export it as an STL file, run it through the slicer, and just a few hours later hold the finished piece in my hand. The printer is also great for creating custom parts with unique designs or specific purposes.
You can see one of these projects in the 3D Printing section. I plan to post additional projects that I think are useful or unique, as they come up.
Thanks for visiting and I hope you see something interesting or useful.
Colin Edgar
Last updated: May 22, 2026